Category Archives for "cleaning tips"

Autumn Cleaning – Part 3

As I promised I am going to tell you about the rest of my big autumn cleaning. During the week I was so occupied that I could actually do anything at all- all day work after that at home I was so tired that I could even think about cleaning.

However, it is Saturday again and I have nothing else to do except finish with the so postponed cleaning. The living room and part of the bedroom- that is the end of this year’s autumn cleaning and I have planned to clean them up today for once and for all.

The living room is nothing special but it takes some time to dust, to polish, to vacuum- you know the procedure. But, yeah, it takes time; especially when you are so easily distracted that you forget what you are doing at that exact moment.  I start little by little, shelf by shelf, I prearrange all of my books and, of course, I take to time to read a passage or two while trying to balance on top of a stool. And I am trying really hardly, this is one dangerous situation and it could become bloody and painful, too.

I finish without any accidents and I am really happy about that. I am about to vacuum the floor now. I take out the vacuum cleaner and turn it on. Oh, I forgot about one of my childhood traditions- I forgot to turn on the music. Now with the music turned on I float in the air, sing and dance if you could say that it is a dance at all. I am like a funny even ridiculous version of Freddie Mercury in the video for the song I Want to Break Free. Bur don’t laugh I am trying really hard and I sing with all my heart and all my voice. Ohhh, the bell is ringing- who could that be? Ops, my neighbours, well maybe I should stop screaming and start cleaning instead. That is one pretty good idea. I continue cleaning but very often I thing that I want to metaphorically break free (stop with that autumn crab), go outside, party hard instead of cleaning hard.
So I clean as quickly as possible. I finish with the living room and I head toward my bedroom where only the wardrobe is well- arranged. I clean up in a slip-shod way- I vacuum without singing this time (I do not want neither to scary nor to make angry my neighbours), dust and polish everything.

Phew, I am done for this year. Now I throw myself in the first armchair I see, grab a cup of coffee and a nice book. Enough physical work let’s train my brain a little bit.

How To Take Care Of The Pet Smell At Home

Undoubtedly, it’s nice to have a pet at home. Animals can definitely bring you happiness. And certainly there’s always something going on when you have a pet. A dog, for instance, can change your day from dull to interesting in a second. Another advantage is that you can rest while it’s keeping the kids entertained.

A pet can change your life completely, but not only in a good way. To take care of an animal doesn’t mean just taking it for a walk. It comes with a whole bunch of responsibilities as well as a great amount of damage. Actually, it’s a big challenge to keep your home fresh and clean when there’s a naughty pet. Even  if you do your best to remove any animal odours, that might not work exactly in your advantage. However, if you adopt the right methods, you’ll stand much bigger chances against the strange smells. So here are some tips to help you get the job done properly.

Firstly, you require some baking soda. As hard it is to believe, baking soda is a natural absorber. It’s the best way to get rid of the unpleasant smells. So you could say soda is your best friend in this fight. Soda is considered to be extremely effective because it’s not only a natural air freshener but it also removes odours on fabrics, furniture and litter boxes.

You could use an odour remover, which is also a good choice. It will prevent your pet from soiling the area again. Once an animal has marked an area, it can smell its own scent. No matter how many smelling candles you light, your pet will still recognise the original odour because candles and sprays just mask the scent without actually removing it. This is why a good neutralizer can help in such situations. It will decrease the chances of your pet to revisit the certain place.

In case all of the above have failed to see through, there is a more drastic way of handling things. If really nothing else gave results, painting may be the answer. A new interior could just be what you needed all along. Remember to clean the walls with an enzymatic cleaner before painting them.

How To Maintain Oak Furniture

Oak has always been a popular material for furniture. Naturally, it makes tables, chairs, cupboards, etc. look so beautiful and elegant. Oak has not only beauty but also strength. This is what makes it so suitable for making furniture out of it. As oak wood is extremely durable, there is very little chance your table, for example, will break. Even though oak has so many advantages, it does have a few disadvantages as well. One drawback you should definitely know about is that this kind of wood material stains quite easily. So if you have furniture made of such material, be extremely careful not to leave stains on it. But if this does happen anyway, don’t worry.

There are certain ways to clean everything, well, almost everything. Just take really good care of your oak furniture. Proper maintenance is important in order to prevent the wood from becoming dry. This way there will be no cracks and the wood will be looking its best. Another thing which might damage oak wood is the severe temperature swing as well as moisture. This is why if you have oak wood furniture, you should be aware how to take care of it. Fortunately, we provide useful tips to help you do this.

Firstly, there are instructions from the manufacturer which go together with your furniture, for sure. It’s a good idea to find them and read them carefully. They might give you essential information so pay close attention to them before you take any action. In case you lost or can’t find your sheet of instructions, you can always go to a furniture shop and ask for a pamphlet on oak wood. It should be able to answer all your questions, if for some reason you’re hesitating about something.

When buying new furniture, it’s better to leave the drawers and doors open. The purpose of this is so that the furniture oil smell can dissipate. Unless you like the smell, of course.

Afterwards, when you start wondering where to place the furniture, there are a few rules you might want to remember. Whatever you do, never put your oak furniture near a heater or in direct sunlight. Otherwise, you risk cracks appearing and colour fading away. If you don’t wish the wood to dry, you also need to apply special wood oil. It will preserve the oak just fine and by this it will last longer.

This is how you can take care of your furniture so that it can always look as if it were new.

How To Clean Woven Garden Furniture

Passing by a neighbour’s house, you admire their garden. You fancy everything in it, both plants and furniture. Naturally, it makes you wonder how they have achieved all this. A little bothered probably with the fact that your front yard doesn’t look anything like this. Then you give yourself over to dreams imagining a pretty little porch. There are those woven chairs and table where you’re sitting having a nice cup of coffee. Sun is going down so the colours in the sky are simply magical. You can also have friends over occasionally for a party. Yes, a beautiful and well organized garden gives you many opportunities for memorable and precious moments. It certainly has its ultimate pluses to maintain the yard’s good appearance. For example, organizing your own gatherings or just making your neighbour green with envy. Whatever the reason is, though, you should always take good care of the furniture you have outside due to constant exposure in the open.

Always check its condition as well as keep an eye out for stains and maybe burnt areas. The material of which the furniture is made is of great importance. Whether it’s metal, wooden, plastic or woven is significant and has to be taken into account when buying such items.

Every material has its advantages as well as some slight disadvantages. Metal frequently catches rust so it’s impossible to leave it out in the rain. Wood, on the other hand, is a victim of various insects. Plastic may sound like a reasonable choice. Although, it is somehow an eyesore. As for woven furniture – it never gets rusty, doesn’t attract termites or ants and it also looks nice placed in the garden.

Another thing about this material is that it doesn’t require a lot of cleaning, either. So if you’re on the search for some garden chairs, this is what you should consider purchasing. In case you already have such furniture, you’ve made the right choice.

But don’t lie to yourself, you still need to clean and take care of the garden furniture no matter the material. Everything requires a good maintenance. Looking on the bright side, at least it won’t take you too long to tick this chore off the to-do-list.

First thing you should do is to get a hose and simply rinse the furniture over. Or another possibility is to pour a bucket of water. If there is some kind of pieces stuck in the weave just use a brush, a toothbrush would also do.

How To Remove White Marks From Wooden Furniture

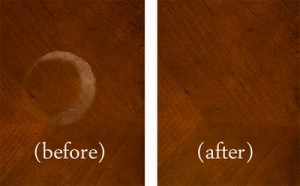
Sadly, white marks appear very easily on wooden furniture. All it takes is a little moisture or some heat, and it’s there forever. Removing them applies the same process. Some of the methods described below work more efficiently on fresher marks, but older marks aren’t impossible to remove. Try them all or only one of them – they are almost sure to remove the white spots and restore the nice look of your furniture.

For the mayonnaise and ash method, you will need some mayonnaise, some ashes or some baking soda, a hair dryer, and some soft cloths.
1. Gather all of the items you will need and prepare yourself for scrubbing.
2. Apply a little of the mayonnaise and the ashes on the white mark.
3. Use a soft cloth to rub the products on the white mark. Follow the grain of the wood.
4. While you’re rubbing with the cloth, add some heat using the hairdryer.
5. When the white stain is gone, use a clean cloth to wipe away the cleaning products.

For the wax paper method, you will need some wax paper, an iron, and a soft cloth or a towel.
1. Turn the iron on to one of its low heat settings and turn the steam off.
2. Put some wax paper over the white stain area.
3. Place a towel over the wax paper.
4. Run the iron over the towel for a few seconds. Repeat a few times. Move the iron around to avoid making a new white mark.
5. Use a new sheet of waxed paper, if necessary, until the white stain is gone.

For the iron method, you will need a cotton cloth (you can use a white t-shirt) and an iron.

1. Turn the iron on one of its lower settings, but you will turn it up later gradually, to avoid making a new mark.
2. Put a cotton cloth over the stain area.
3. Turn on the steam of the iron and move it overt the cotton cloth. Don’t keep it in one place, as this will make a new white spot.
4. Go on doing it until the white spot is gone.

You can find commercial products like Jasco White Ring Remover which can remove such white marks. You can find these at home improvement and hardware stores.

If the watermark is still fresh, try drying the area quickly using a hairdryer and you may prevent a mark.

Tile Grout Cleaning Methods

There are many types of floor covering, but ceramic tile is the most popular type used in kitchens and bathrooms. It’s popular because it doesn’t absorb water and dirty like the other types, but it’s hard to clean, particularly the grout lines.

Prevention

Grout lines are the most difficult part of cleaning ceramic tile. If you don’t take proper care of it, the grout will start to crumble and that is certainly bad news for the flooring. The best way to prevent that is to seal the lines when the ceramic tiles are installed. You can buy do-it-yourself product kits from most home improvement retailers. They make the job really easy to complete. Some of the do-it-yourself kits include a brush, while others do not, and you have to buy one yourself. Be certain to read the directions on the label, as different grout sealers require different time to dry.

Significance

Dirty grout is ugly to look at, and can also damage your flooring beyond repair. Grime and dirt that settle between tiles can easily break the grout down and make it crack. Once that’s happened, the tiles are at risk of cracking themselves.

Types

There are many ways of cleaning the grout lines. The method of cleaning can discern according to whether the grout has been sealed or not. There are different commercial cleaners on sale, which are designed to clean grout, but most of them are harmful due to the fact that they contain chemicals and bleaches. Those chemicals can not only change the colour of unsealed grout lines, but can also pose a threat to children and pets. There are other, more natural solutions, like the homemade grout cleaner made from vinegar, baking soda, ammonia and water. A different method that works successfully is the steam cleaner.

Warning

Avoid using any types of cleaner on fresh grout and/or sealer. That could cause even more susceptibility to dirt and crumbling. Ask your floor installer or check on the label of the do-it-yourself grout sealing kit that you have used to know how long you need to wait before you can clean the floor.

Expert Insight

Check the grout lines in your bathroom regularly, especially those in the shower. The grout in the bathroom is exposed to lots of water and humidity and that can cause long term problems, especially if you haven’t sealed the lines. That kind of place is the perfect habitat for mould and mildew. Spray shower cleaner on the tiles after each time you bathe so you can prevent such growth.

Getting Rid of Mould And Mildew On Wood

Mildew usually grows in moist and warm environments. If there’s oxygen, moisture and even a little organic material, it can grow. However, it’s not that difficult to remove it – in fact, it only requires some simple steps to be done. If it appears again, even though you’ve removed it, then you didn’t clean it away fully. Most of the products used for removing mildew are chlorine based, and if you don’t remove the mildew fully, it will go back using the chlorine residue. To remove the mould once and forever, you’ll have to repeat cleaning many times and regularly.

To remove mildew from painted wood, you will need some chlorine bleach, some water, a few buckets, several sponges and a pair of rubber gloves.

1. First, pour a gallon of water in the bucket and add ¾ cup of bleach in the bucket.
2. Fill another bucket with clean water only.
3. Dampen one of the sponges in the cleaning solution and start scrubbing the mildew and the mould gently until they’re gone. Don’t soak the wood with water, as it will just cause damage. If the mould is stubborn, repeat several times, but dry each time, so that the wood doesn’t become saturated.
4. When the mould is removed, rinse with some of the clean water in the second bucket.
5. Make sure that you’ve removed all of the bleach so that there is no chance of the mould returning.
6. Let the wood dry.

To remove mildew from unpainted wood, you will need some chlorine bleach, some water, a few buckets, several sponges and a pair of rubber gloves.

1. First, mix three parts of water and one part of bleach in one of the buckets.
2. Pour clean water in the second bucket.
3. Dampen a sponge in the cleaning solution and scrub the mould and mildew gently until you’ve removed it all. Don’t let the wood soak in water, as it will be damaged.
4. When you’ve removed all of the mould and the mildew, rinse with clean water thoroughly.
5. Make sure that you’ve removed all of the bleach solution, otherwise chance is high that mildew will appear again.
6. Let the wood dry completely.

You can buy some commercial protective sprays that can resist soil and water, and thus prevent any mildew growth.

There are cleaners made especially to remove mildew and mould. Usually, they contain harsh chemicals and you should be very careful when using them. Always read the instructions on the label before you start cleaning with them.

Maintaining Your Drum Kit

There is a saying about all musical instruments. Looks good – sounds good. Drums are no exception. It is hard to maintain the entire kit especially for a professional, but given the rewards you can’t fully neglect the task required. It doesn’t matter if it’s a rookie kit or a pro. Keeping your drums clean is its own benefit. If you’re a stage performer you will know this to be true. But despite this, the overall life and performance of your drums will be higher. Here is some useful advice on maintaining you drum kit.

  • Remove all hoops and heads. Make sure only the shell remains.
  • Apply polish on all the metal components like the hoops. Some wax may also prove useful.
  • Afterwards leave the polished metal for several minutes. Buff them off with a fine brush. Use it to good effect in order to get to the tighter areas.
  • Using a mixture of lemon oil and chamois rub it in the wooden parts inside the shell. That will help keep moisture away and refresh quite nicely.
  • The same can be applied to the outside of your shell. But unlike the inside, you can use a duster to polish any smudges, should they remain after the polishing.
  • After putting the heads back on you can now start tuning with DrumDial. This process is strongly individual, so do that based on your experience and senses.
  • Chrome polish once again comes in handy when cleaning the pedals. Use a dry cotton cloth to wipe it off afterwards. You can also use some lube on the moving components. You can dust it off after. Be sure to use a brush in order to get to the areas which are harder to reach or require careful maneuvering.
  • Cleaning the stands will also require chrome polish as they are likely metal. The same process can be repeated as it was when cleaning the pedals. Polish, wipe off and then dust off if necessary.
  • And now all that’s left to do is to wrap up the cleaning ending with the cymbals. There are cleaners specifically designed for cymbals out on the market, but any polish will do just fine. Cloths, paper towel and a toothbrush will be required here. Placing the cymbals on a stand will be the easiest way to clean them on both sides. Applying polish and buffing it off when they’re in this position will be a snap. Use the tooth brush when removing polish near the logos as it requires a bit more care.

The cleaning process can generally be repeated once every two months. But based on how often are the drums used, it can be done more or less frequently.

How To Organize Your Bathroom

The bathroom and the kitchen are the basis of every home. They are repaired and rearranged very rarely so once you decide to arrange them you need to pay special attention to them. The bathroom and kitchen are like an investment because they are used all the time and we cannot do without them. But every good investment requires first of all funding. So, we need to put the needed means into the arrangement of those rooms in order to be able to use them for longer without any problems. You may not cook every day or eat at home but you certainly visit the bathroom every morning and evening to take a shower. Therefore, it is compulsory that you arrange your bathroom in a way that it will give you the necessary relaxation, comfort, pleasure and last but not least resistance. Here are some tips that can help you do this the right way. 

First, your bathroom should be arranged in a way that it will be easy to clean. The materials you use play quite an important role in this. The best choice for bathroom floor is tiles. They are stylish, sanitary and easily cleaned up. Their kind and appearance, of course, depends on your personal taste. The tiles can be one-colour or a combination of several colours. The most appropriate ones for a bathroom are the cold and light tones such as blue, green, purple. But you can also use other colours as long as they are not too dark or bright as they will certainly annoy the eye and hamper your relaxation. The tiles should be placed on the floor and the walls and the ceiling should be coloured with oil paint. This is the best choice if you don’t want the appearance of mould. 

Another important thing is the furniture. Make sure you choose only the most necessary ones because otherwise you risk your bathroom to be crammed. Pick stylish and plain furniture that match the tiles and the walls of the room. The mirror is an important object that every bathroom should have. You will use it every day so choose it according to your personal preferences and needs. Another significant thing is the choice of cupboards and shelves. Define their number and size according to the possessions you are going to keep there. Make sure they will be at hand when you are under the shower. 

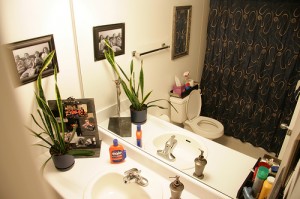
If your bathroom is large enough you can place a bathtub there. It is a luxury and comfort for everyone who needs extra relaxation and pleasure. But if you don’t have much space you should arrange your bathroom using the most necessary furniture and objects. You can also find a place for a potted flower which will add a personal touch to the room and make it look exotic and beautiful.

How To Clean The Chopping Board

We use the chopping board all the time to help us cut different kinds of food products. It is a useful object and we could not do without it in the kitchen. But the problem is that it gathers all kinds of smells and remnants which sometimes cannot be removed just with an ordinary cleaning product. It is essential to keep our chopping board clean and sanitary by washing it properly and regularly because it touches the food we eat. So, how to clean the chopping board? 

The way of cleaning your chopping board depends mostly on the material it is made of. Plastic and glass chopping boards can be cleaned up in several ways. But the easiest and fastest one is to put them in the dishwasher. In this way they will become clean and disinfested and will save you some work. You can make your own cleaning product using borax and baking soda and then wash with distilled vinegar or just choose one of the universal cleaning products. It depends on your preferences. 

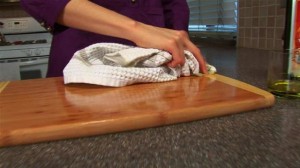
Wooden chopping boards, however, are completely different. They should not be put in the dishwasher as they could get cracked and damaged. They should not be soaked in a sink filled with water, either. Then, how should we clean wooden chopping boards? You should treat them with mineral oil which should be safe for your health. It will prevent the chopping board from absorbing different liquids and food remnants. Rub the board with the oil and let it dry. Repeat this procedure once a month. What should you do after you have prepared your chopping board? The best way to clean it is to wipe its surface with hot soapy water. But you should not soak it in water. After you have cleaned it let it dry completely. 

You can disinfest your chopping board in several ways. As soon as it has dried, you should spray its surface with distilled vinegar and leave it like this for a while. After that, you should wipe it. Vinegar acid removes all kinds of bacteria from your chopping board. 

Another effective way to disinfest the chopping board is to combine vinegar and hydrogen peroxide. Spray with one of those solutions and then with the other one, no matter which is first. Leave them for a while and then wipe the board. When you finish with all of this you will have a clean and sanitary chopping board which is ready to be used again.