Category Archives for "cleaning tips"

Taking Care Of Your Furniture – Vol.2
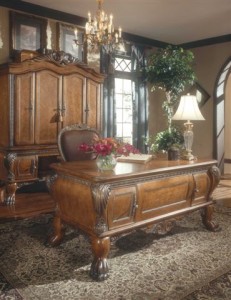
Oak furniture should be cleaned up by rubbing with a wet leather cloth and then with a woollen or silk cloth until they are polished. Another well-tried method is to rub the oak furniture with cool beer and then polish it with a woollen or silk cloth. In this way you can also remove grease stains. 

Stains from water or some other liquid on oak furniture are cleaned with a mixture of oil and salt; it should remain on the stain for one or two hours; after its removal the stained spot should be rubbed with a wet towel and then polished with a dry cloth and finally with wax. Another way to clean liquid stains is cigarette ash. Mix it with some oil and then polish the surface with a dry woollen cloth. 

Polished furniture can be cleaned by rubbing with a soft cloth soaked in milk. After that, wipe them with a velvet or soft woollen cloth. Another way is to use Chinese tea. Strain the tea well and wrap it in a soft towel and rub the polished furniture with it. After that, wipe it with a clean dry towel. 

Cracks on wooden furniture can be concealed with wax. You should first hold it in your hands until it becomes softer and then put it inside the cracks. The unnecessary wax should be removed with the help of a wooden spoon or a knife. After that, the surface should be rubbed with a woollen cloth until it starts shining. If the furniture is black or brown you should add some paint while rubbing. 

If the drawers are difficult to close and open you need to rub them with talc or soap. 

In order to protect the upholstery of your furniture from dust and dirt you might need to put loose covers. But still you need to periodically clean the upholstery. You can do that with a mixture of turpentine and naphthalene. If there are grease stains on the upholstery they can be removed with a mixture of magnesium powder and benzene. Leave the mixture on the stain until it dries and then use a brush to remove it. If there are any traces from the stain repeat the procedure. 

Leather furniture can be cleaned up by rubbing with a woollen cloth soaked in benzene. After that, use a cloth soaked in beaten up white of an egg.

Taking Care of Your Furniture – Vol.1

Furniture plays an important role in shaping the overall style and appearance of the home. When the furniture in the room are appropriately picked and arranged you have the feeling of space, light and tidiness. And when the furniture are chosen in a way that they match everything else in the room and they complete its appearance then you feel good and happy at your home.

Furniture is not purchased every day so they need special and regular care in order to be maintained in a good condition for longer. Each kind of furniture needs different cleaning and maintenance. Therefore, you need to know how to take care of your furniture so that you can keep it new, stylish and elegant for as long as possible. 

A very important factor for the condition of furniture is that they need to be placed on an even floor. If it is uneven it might cause damage and warping to furniture. 

When moving furniture you need to carry them from one place to another and not drag them. This will prevent their legs and the floor from scratching. 

Keep your furniture away from damp. The continuous influence of damp on your furniture is extremely harmful and they will most certainly be deformed and damaged. 

When there are stains on the furniture you need to remove them right away. If there is even a small damage it needs to be immediately fixed. 

Dust on polished and lacquered furniture should be removed with a clean soft towel or a velvet cloth. Do not use damp towels and cloths because due to damp polish and lacquer lose their shine. 

Mahogany furniture should be cleaned by rubbing them with vinegar or cold tea and after that with a soft cloth. Their polish can be refreshed by treating with a cloth which you need to wet with cool water and then wring out. After that, rub it with a dry linen towel. 

Lacquered furniture is cleaned by treating with a soft tampon soaked in gas. Then polish it with a woollen cloth. After the cleaning you need to air the room. 

Stain wood furniture should never be washed with water. Wipe them with a dry soft cloth every day. When they are damaged they need to be renovated with one-colour stain. Do not place such furniture near fireplaces and stoves.

How To Organize Your Wardrobe

We all assign a special place to the wardrobe in our bedrooms. It is the place where we keep our clothes, sheets, covers, hats, belts, scarves and many other accessories. Every morning we open its doors in order to choose our outfit for the day and most of us (women) spend much time changing several sets of clothes and appearances. When we open the wardrobe door it is good to see and to be able to find everything we need. It is essential that our wardrobe is well arranged and organised. We need to follow certain rules when we put our wardrobe in order so that it will be convenient for us and save us time. 

First, we need to define separate sections in the wardrobe for each member of the family. If we have separate rooms and therefore separate wardrobes for everyone it will be even better. Then we will have a larger space for ourselves which we will arrange the way we want. If, however, we share a wardrobe with someone else, everyone needs to have their own space. 

Then, you need to separate your clothes in different sections according to certain criteria. You are the one who has to choose what these criteria should be. For example, you can divide your clothes according to their colour. You can start with the white ones and finish with the black ones. That is, from lighter to darker clothes. In this way your wardrobe will look nice and it will be easy for you to find each piece of clothing. 

Another idea is to make separate sections for your working outfits, daily and party/evening ones. In this way you will know exactly where to look according to the occasion. 

Another useful thing you can do is to make different sets of outfits while arranging your wardrobe. You can combine your clothes in ways that they will be ready to wear. You can also add accessories to them so that you will save some time from ferreting and wondering what to choose. 

As we mentioned accessories, they should also have their place in your wardrobe. So create a separate section and arrange them according to their kind. 

You should also define a section for underwear and household linen. The clean linen should be always ironed, folded and arranged well. 

It is good if you have enough room to put hangers so that your clothes will not rumple. But you can also use the shelves for those clothes that are not easily rumpled. Do not forget to set room for your shoes, or course. And it’d better be a large space.

Spring Cleaning Of Your Piano

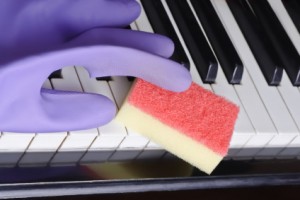
Spring cleaning, as you know, is the time when you really have to make everything look and be as new as possible. There are certain articles of furniture that you can’t clean with just a dusting, like the piano. No matter what type it is, it’s certain to sound better after a deep clean. After all, it’s one of the most enjoyable instruments that one can have in one’s home, take proper care of it, so you can enjoy it for many years to come. You have no idea where to start from? Here are some simple instructions:

1. Get some white vinegar and a gallon of water. Warm the water and add 2 tbsp. of the vinegar. Now you’ve made a suitable all-purpose cleaning solution. Fill a spray bottleful of it.

2. Dampen a lint-free cloth with the mixture. Start at one end of the keyboard and wipe each key individually. When it feels dry, re-dampen the cloth.

3. Take another clean cloth and wipe the keyboard again to remove any moisture and make it shine.

4. With the same solution that you used for the keyboard, wipe the entire outside of the piano case using a dampened clean cloth.

5. Apply furniture paste wax, following the directions on the label carefully. Try not to use too much or too little. When you’re finished, buff it with a clean cloth.

6. Look for any spots of wax that you’ve missed. If there are any, fix them – the wax doesn’t only condition the wood but also repels the dust.

7. Move on to the pedals. Take a soft brush and brush them (you can even use a soft paintbrush or a toothbrush). This way you can easily remove the grime that has built up.

8. Get some liquid brass cleaner and apply it on the pedals, strictly following the label’s instructions. For an applicator you can use an old rag.

9. When you’ve applied that, buff them with a clean cloth. Check if you’ve gotten everything off, and that you haven’t splashed some on the wood.

10. Finally, clean the strings with a fine quality steel wool. Rub it from left to right. Remove all the rust and keep rubbing until they start to shine.

11. For the bass strings, use a coarser type of steel wool.

12. Finally, clean the soundboard of all the wool remnants.

How To Spring Clean Your Yard?

Once the snows of winter start melting, you know that spring can’t be far off. As a part of the annual spring cleaning, you decide to take care of your yard before the green has sprouted. It’s probably in an awful condition, and you feel overwhelmed. There are some suggestions as to how to take care of it:

So, how to spring clean your yard? Just follow the following steps:

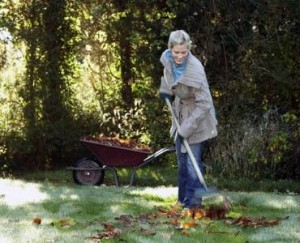
1. Using a rake and lawn bags, clean up tree limbs, leaves, trash and everything else that’s not supposed to be there.

2. Get your pruning shears and cut the overgrown shrubs and bushes. They have most probably grown in all directions, and that doesn’t look very good, does it?

3. The winter cold has probably killed of some areas of your garden, so reseed your grass to prevent many muddy puddles appearing once the rain begins.

4. If the yard is dry, water it. Start the water sprinkles in the dry areas – that’ just what plants need to start their spring growth.

5. If you had a warm winter, there may already be grown grass. If it’s necessary, cut it – that will not only make it look better, but also help it’s growth.

Spring Cleaning Of Your Wardrobe

Tidying your wardrobe is a big part of the annual spring cleaning. Getting ready for summer is a big deal, but organizing all those clothes can prove to be a difficult chore. Here are several simple steps to follow, resulting in a clean wardrobe:

1. Take everything out. Don’t forget, you’re not just re-organizing it, you’re spring cleaning it, so make three piles – one with clothes you’re going to keep, one with clothes you’re going to put away for next winter, and one you’re going to donate or throw out.

2. The firs pile includes pieces that are seasonally universal – white t-shirts, skirts, jeans. Decide if any clothes are too outdated and unfashionable. However, try to think of a way they can look trendy before you reject them.

3. The winter sweaters, mittens, scarves and boots you’ll have to put away. Fold the clothes carefully and put them in boxes that you can stack in the back of the closet.

4. Take a look at the remaining items. If there are some clothes that you haven’t worn for more than 6 months and don’t see yourself wearing ever again, donate them. If there are some items that no longer fit, there’s no reason to keep them, even if they are very cute and you tell yourself that you’ll diet. Donate them, instead.

5. Organize all the accessories – the belts, hats, gloves and scarves. As with the clothes, donate anything you don’t like anymore.

6. Consider buying and hanging wardrobe freshener sachets – they keep away moths and prolong the freshness of newly washed clothes.


How To Organize Spring Cleaning

Spring is the time for getting rid of the winter dread and getting ready for the sunny summer. The infamous spring cleaning is a must-do every year when the snow melts. But such a major project can be pretty confusing, so it’s best to organize it beforehand. How to do that? Here are some suggestions:

1. Write a list, including every room in the house that needs to be cleaned.

2. Describe what you have to do in each room, for instance in the kitchen – clean the sink, wash the windows, clean the refrigerator and freezer, etc. This way you won’t forget anything.

3. Make a list of things that should be repaired or replaced, like a leaking sink or air conditioning filters.

4. Divide the responsibilities between the whole family. If your children are young, give them something simple to do, like gathering misplaced items.

5. Reserve a weekend for the spring cleaning, and make sure that no one else makes any plans for that time.

6. Write down all that you’ll need – cleaning detergents, number of clean rags, mops, machines, etc., so that you can remember to buy anything that you need and not start looking for something in the middle of your work.

How To Clean Rust Stains From The Toilet

Rust can form owning to many factors. Most usually, it is caused by iron deposits. This happens often when you’re using well water, or hard water. And unlike all other kinds of stains, rust seems to dig into the porcelain and it’s more difficult to remove. It’s not impossible, however.

For cleaning rust from a porcelain toilet, you need a pumice stick, some water, a pair of rubber gloves and a lot of effort.
1. Put on the rubber gloves. It’s optional, but you will be cleaning the toilet, after all. I’m sure you don’t want your hands covered in toilet germs.
2. Dampen the pumice stick in some water.
3. Rub the stained areas with it.
4. When the rust is gone, rinse the area.

You can also use chemicals.

You will need some ZUD or The Works, a scouring pad or a toilet brush, and a pair of rubber gloves.
1. Once again, the rubber gloves are strongly advisable, especially when you’re using chemicals.
2. Apply the cleaner of your choice around the basin.
3. Leave it for 5 minutes.
4. Scrub the stains with the toilet brush or with the scouring pad.
5. Add some more cleaner on the exposed areas.
6. Leave it again, this time for an hour-hour and a half.
7. Scrub the stains once again.
8. Simply flush the toilet to rinse.

You can try cleaning the rust with some citric acid.

You will need some citric acid powder and a toilet brush.
1. Drain all the water from the toilet, but don’t dry it out.
2. Sprinkle the stains with some citric acid powder. If you don’t have any, try using drink mixes that have some – for example, powdered lemonade.
3. Leave it like that for at least 30 minutes. If you can, leave it for 12 hours.
4. Scrub the stains with the toilet brush.
5. Turn on the water and wait until the basin is refilled.
6. Simply flush the toilet to rinse it.

If the rust stains have been there for a long, long time, then you probably won’t be able to remove them, as they have etched themselves in the porcelain.

“The works” contains acid and if you have a septic system, don’t use it.

Another thing you can use to remove rust from the toilet is a mix of lemon juice and salt or lemon juice and comet.

How To Clean A Stone Fireplace

If you want to clean your own stone fireplace instead of hiring a professional chimney sweeper, follow the method below.

For this, you will need some Tri-sodium phosphate, some bleach, some warm water, a bucket, a sponge, a stiff bristled brush, some old blankets or towels, a plastic tarp, some duct tape, a pair of rubber gloves, and eye protection.
1. Before you start, put on the rubber gloves and the eye protection and don’t take them off until you’re completely finished.
2. Make a mixture of tri-sodium phosphate and warm water in the bucket by following the directions on the label. If the fireplace is really dirty, then make a stronger solution.
3. For every gallon of solution you make, add about 2-3 ounces of bleach.
4. Place the plastic on the floor around the hearth to protect it. Tape its edges.
5. Put blankets and towels around the area to catch any runs, drips, and overflow while you work.
6. If the fireplace is seriously dirty, apply the solution with the sponge before you start scrubbing and leave it for a bit.
7. Start scrubbing with the scrub brush. It will require a lot of effort, as stone is very porous and the dirt has sunk in. The eye protection is essential here, as while you scrub, droplets of the solution will fly around. Try not to open your mouth, too.
8. If there are some stubborn stains, make a mixture of tri-sodium phosphate and water in the form of a paste and apply it directly on the stone. Scrub as much as you can.
9. Clean the stone with a wet sponge to rinse it.
10. When the stone is clean, leave it to air dry and only after that remove the blankets, the towels and the plastic tarp.

Don’t ever, EVER, try to clean a fireplace with a flammable liquid. It can’t be removed, and once you light the fireplace, it will pose a serious flame hazard.

Don’t use a lot of the bleach, as it will fade the colour of the stone.

If streaks appear, you have to use more water.  Clean from the top to the bottom.

Just in case, before applying the cleaning solution, try it on a hidden spot and leave it for 24 hours just to see if it won’t harm the stone.

Always clean the fireplace when it’s cold. Don’t try to clean one which is heated or still in use.

Before cleaning the fireplace, scoop out all of the ash and fire debris, because they may just make a bigger mess.

Pantry Time For Aesthetes

Many of us have faced the fact that a food should be thrown away, because of the inability to eat it. How we know? Well, there is a smell, a change of colour, even some little meat-worms or ants, if we were on a vacation and forgot something perishable in the pantry. If it is stale, it should be thrown away.

After throwing it, however, we still have to get rid of the smell in the pantry with the purpose of preventing what’s left of its content. It can be done quick and efficiently if you have your way of handling things.

Remove all from the inside by freeing one section at a time. One shelf, and then the next one. You can pull a table for all of the content or a piece of cardboard for each shelf. Determining a clear section for each part of the pantry will be very helpful when you return the goods back in.

After that throw anything you don’t need: it is not necessary that in your pantry all you have is food. So throw it away, if it is useless. Decide and get rid of spoiled or infested food, or such which you do not know how to prepare or use. Take out the old umbrella, you will find a better place for it than in the pantry. Remove chemical stuff. They should not be in close compartments and within the limits of the living parts of the house, or next to food, drinks or easily lid material. Better find a place for them in the garage.

Start cleaning the pantry by wiping every shelf. Though some of them might be clean, do not hesitate to use a damp cloth for all of them. Remove any cobweb, remnants or dirt, reveal their true colour if it is possible. After finishing, let them dry for a while, but with no sign of moisture – thoroughly. Now you can line them up, or check for loose ends and straighten them properly.

After doing so, comes the time to return the content back. In all the cases, without exception, it should be less than the one you took out from there. Clean each compartment, container, box or packing. If anything has leaked, change its packing before putting it back.

A good and helpful idea is the organization. You should separate food in one section, and other goods – in the other. On its turn, food can be divided into different categories – spices, bottled fruit and vegetable, canned food. Put in the back those which you will not use presently, and the ones you need immediately, at the front of the rows. Leave a small empty area, which in all the cases, you will need, if you tend to keep valuable material and you need more space.

Step back twice and enjoy the look of your new pantry.