Category Archives for "cleaning tips"

A Couple Of Useful Tips For Cleaning The Dishes
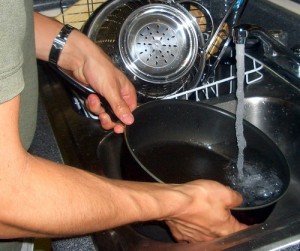
Doing the dishes is an everyday practice for all of us. Some of us use dishwashers in order to save time and ease our work. Many, however, prefer washing the dishes by hand. It takes more time and effort and it is not a very pleasant activity but it is inevitable because we need to do it every day.

Every housewife, of course, knows how to do the dishes as she is used to doing it and does it in her own way with products that she has chosen. The different kinds of materials, however, require different type of maintenance and cleaning. Some of them need special care because they are more tender and demanding and we need to have that in mind when washing our dishes.

There are some natural methods of cleaning dishes which we should know and apply when needed.

Fireproof dishes are convenient and cooking in them is easy. They prevent food from burning. But they are also tender and prone to cracking or breaking if they are not maintained properly. The first thing you should know is not to put cold liquids or products in a heated fireproof dish. When cleaning those dishes do not scrub them with wire or abrasive products because they are easily damaged.

Aluminium dishes are also widely used in the modern kitchen. They are light, easily cleaned and resistant. Despite that, they need to be kept from pressing or hitting because they can be deformed. You need to clean them well with soap and water. You should avoid scrubbing them with abrasive products because their surface might be damaged. You should leave washed aluminium dishes to dry or wipe them with a towel but do not put them in the cupboard while they are wet.

Enamelled dishes look nice and they are easily cleaned. In order to keep them in good condition and use them longer you need to follow some rules. Enamelled dishes easily crack when there is a sudden change in temperature so be careful with that. Wash those dishes with soap and water. If there is grease on them scrub them with some baking soda and soap. In case they are burned you can clean them up by soaking them in water with a tea spoon of soda added in it.

Removing Odours Emitted From Rotten Food

If there’s an odour source in your home that you haven’t removed for a long time, then the odour will linger on even after you throw it away. This is the case especially if the source was something in the refrigerator or the freezer. Here are some methods for removing such odours.

You will need some vinegar, a few cans of coffee grounds, some activated charcoal, a few bowls, an air neutralizer, some baking soda, some laundry detergent, a washing machine, a vacuum cleaner, and some cat litter.
1. Getting rid of odours can be very difficult if you’re not sure what the source is exactly, or where the odour is clinging to.
2. Naturally, first you’ll have to take care of the freezer, where the smell comes from.
3. If the item which emits the odour is still there, turn the freezer back on and freeze it again. This will remove some of the smell and it won’t be as bad when you have to remove it.
4. When they’re frozen, throw away the rotten items at once. Take out the trash from all the trash cans in the house.
5. When you’ve removed the rotten items, it’s time to take care of the freezer or refrigerator.
6. First, mix water and bleach.
7. Clean the entire inside with the mix and a clean cloth.
8. Rinse with a cloth dampened in clean water.
9. Wipe all the surfaces with undiluted vinegar.
10. Let them air dry.
11. Fill a few bowls with baking soda, vinegar or fresh coffee grounds.
12. Put the bowls in the fridge or the freezer and close the door.
13. The baking soda/ coffee grounds/ vinegar in the bowls will absorb the odour for a week. If the smell still isn’t gone, refill them again.

To remove the odours from the house:
1. When you’ve cleaned the freezer or refrigerator, you can fight the odour that has been absorbed in other areas of the home.
2. Take off the curtains and the drapes and wash them or take them to get dry cleaned.
3. Sprinkle a good amount of baking soda on the carpets.
4. Let it sit overnight.
5. Remove on the next day by vacuuming.
6. If there’s still some odour in the carpets, repeat.
7. If that doesn’t help, try using a steam cleaner with vinegar on the carpets. The smell of vinegar will remain for a few days, but will be gone after that.
8. Clean the upholstery with an odour neutralizer.
9. Let it dry.
10. When all the fabrics and carpets have been deodorized, fill bowls with cat litter, vinegar, coffee grounds or activated charcoal and place a few in each room.
11. Open all the windows.
12. This all should remove the odour. If it doesn’t, then there’s another source of smell, which you haven’t removed. When you do, these steps should help you quicken the otherwise natural odour dissipation.

How to Neutralize Different Odours at Home – vol.2

We continue with the tips on how you can remove any kinds of odours from your home. Follow these rules and you will have the needed results for sure.

In order to diminish strong fish odour from the frying pan you should wash it with strong tea. The tea will neutralize the odour and the pan will smell clean.

Turnips can lose their unpleasant smell and sharp taste if after they are cut and grated they are washed with cold water. Then, they become ready to be cooked or eaten right away and they have much better taste.

You can neutralize the nasty garlic smell from your mouth in several ways. You can drink a glass of milk. Another way is to eat a few leaves of parsley. Or you can eat some coffee grains or ground coffee. Try some of those methods and your breath will be fresh again.

You will remove garlic odour from your hands by rubbing them well with salt and then washing them with cool water.

You can neutralize garlic and onion smell from the chopping board by pouring some hot water on it. After that, wash it with soap or scrub it with a brush and some sand. Then, wash it with cold water and leave it in a dry airy place.

You can remove characteristic smells from the wardrobe or cupboard by putting some powdered mustard in them. Close them and leave them like this for twenty-four or forty-eight hours and then wipe them with a dry towel. They will be clean and you will be able to put your clothes in there without any worries.

In order to neutralize unpleasant smells from the sink you should pour strong borax solution in the drain.

If you want to remove fish odour from the kitchen you need to burn a spoon of sugar. The odour is very strong and persistent but this method diminishes it effectively.

The smell of paint can be neutralized by putting several utensils of salt water in the room.

Cigarette smoke can be diminished by hanging a wet towel or a sponge in the room and wash it once in a while. It will absorb the smoke and the smell and the air will be clean.

In order to refresh your bath sponge, soak it in salt water. After a few hours, wash it and leave it in an airy place to dry.

How to Neutralize Different Odours at Home – vol.1

Odours at home can be caused by various factors. They mostly come from the kitchen due to different kinds of food products or food leftovers, garbage disposal, etc. But they quickly spread all over the house and this is quite unpleasant. We all want our home to be nice to live in and to smell fresh and good but it is not enough to aromatize it with different sprays, candles, etc.

That is why we should first discover the source of the unpleasant odour and then try and neutralize it. Different smells are removed by using different methods so we should know them in order to deal with this problem.

The smell of milk that has been boiled over is nasty and it spreads quickly all around the house. In order to prevent this from happening you need to cover the milk with wet paper splashed with some vinegar. Vinegar completely absorbs the odour from boiled over milk.

The smell of burnt milk can be removed by putting the utensil while it is still hot in cold water and adding some salt.

When you cook something with cabbage the house is filled with this characteristic unpleasant smell which is too stubborn. It is difficult to remove even when you air the room. In order to avoid this, you should put a slice of bread wrapped in clean paper inside the utensil in which the cabbage is boiling. Or you can put a towel folded in two and soaked in water and vinegar under the cover of the pot.

In order to neutralize the odour from the knife with which you have cut onion you should rub it with warmed up salt and then wash it with water. Another way to remove onion smell is to wash the object with hot water and vinegar.

You can diminish fish odour from plates and forks by washing them first with soap and water and then rubbing them with lemon peel. Finally, you should wash them with water only. If you do not have lemon peel at hand you can use vinegar.

In order to neutralize the unpleasant smell of burnt grease, put half an onion in it or a half of sliced potato and stir for about 10-15 minutes while it is still on the stove.You can remove any kind of smell from your hands by adding several drops of ammonia in the water with which you wash them.

How To Remove Smoke And Other Odours From Non-Washable Items

The smell of smoke is very strong, and thus hard to remove from non-washable items. It is, however, possible to do it, and there are other methods to absorb odours. Here are some of them.

The fresh air method

You will need a clothes line or a drying rack.
1. If there are items that you can’t wash or dry clean, the only way to remove the odour is to let them air out.
2. Place the drying rack outside or next to an open window. Use a clothesline, if you can, but it’s not a good idea to leave items directly in the sunlight, as their colours may fade.
3. Place the smelly items on the rack and leave them there to air them out.
4. Leave them like this for several hours, or for as long as it takes to remove the smell.

The baking soda method

You will need some baking soda and a brown paper bag.
1. As baking soda can absorb odours, you can use it for items like stuffed animals, feather boas, etc, which can’t be washed.
2. Put the item in the brown paper bag.
3. Place some baking soda in the bag.
4. Fold the top of the bag to close it.
5. Shake the bag slowly as to let the baking soda go around all parts of the object.
6. Leave the paper bag like this, with the baking soda and item inside, for several hours.
7. After that, go outside with the bag and take the item out.
8. Shake it well to shed away the baking soda.
9. Repeat until the smell is gone.

The coffee grounds method

You will need some fresh coffee grounds and a brown paper bag.
1. Put the smelly item in the paper bag.
2. Add some fresh coffee grounds in the bag.
3. Fold the top to close it and shake the bag a little. Then, put it aside for several hours to allow the coffee grounds absorb the odour.
4. Take the item out of the bag and shake off the coffee grounds.
5. Repeat as many times as necessary.

The vinegar method

You will need some white vinegar, some water and a spray bottle.
1. If the item it moisture-tolerable, you can remove the odour with vinegar.
2. Fill a spray bottle with one part of water and one part of vinegar. If the odour is very strong, you can use straight vinegar.
3. Spray some vinegar on a small, hidden area and leave it for several hours. If there aren’t any negative effects, you can apply the vinegar to the whole item.
4. Spray the item with the water and vinegar mixture.
5. Let it air dry.
6. There will probably be a smell of vinegar around the item, but it will be gone in a day or two.

The Importance of Deep Cleaning

Unfortunately, no matter how hard you try to clean everything every single day, dirt has the ability to set in, and this is the reason why it is so difficult to be removed completely. It requires something more than the daily tidying up.

Everybody wishes to have an impeccable house and to be a good housekeeper, but maybe the most essential in fact remains the idea that after deep cleaning you will rest more relaxingly and less worried knowing that you have overcome the dirt and cleaned the one that cannot be seen on a short notice.

The look of your house is indeed important but the most crucial is still the health of your roommates or family members.

So, it is a good idea to schedule days of the week you dedicate to deep cleaning.

To start with, after you have already cleaned the floors in every single room with the hoover, you have to take care of the so-called ‘hard to reach’ spots like the corners, the space behind the furniture, or under the cushions that you usually forget to clean, and the items that generally collect dirt on their surface.

Your vacuum has special attachments for these things or at least for the corners, like the brush, so now it’s time to use them!

Don’t worry if you keep thinking that even after you have moped the floors there is still remaining dirt in your home, this happens quite often and most of us have the same problem.

Use a cloth to wipe the surface of the furniture, mop the floors or use the vacuum and at the end polish the furniture, especially if leather. There is a great variety of sprays and cleaning supplies in the stores now, so you will have the real chance to choose the ones that fit your budget and have considerable price.

Furthermore, sunlight and fresh air will naturally help too to keep the place clean.

And remember that bacteria hide on what people’s hands touch like all the handles in the house, so you need to disinfect and wipe these areas as often as possible in order to deep clean. Take care of all the space under of behind the furniture, and you will have less problems.

Good luck.

How to Take Care of Carpets Using a Household Supply

It is only natural that every good housekeeper wants to do his or her job in the best way and yet spend as less money as possible on cleaning tools and products (which includes cleaning carpets since they take a big part of every room and in this sense a clean carpet can make the whole room look cosier and neat).
Do not spend your  time and money for carpet cleaning products that are available at the local store. You can make this less harder and cheaper with products from your house.
The most important things you need to find are some old left spray bottles,brushes and sponges.
Here is the list of steps you will follow which includes the rest supplies that will come into use.

First of all, you have to make a mixture of one quarter c. mild liquid dish detergent (containing no bleach or alkaline) and one gallon warm water.
Then, choose an area  of the carpet surface that is hidden maybe on the backside of it, and try the mixture for carpet discoloration.
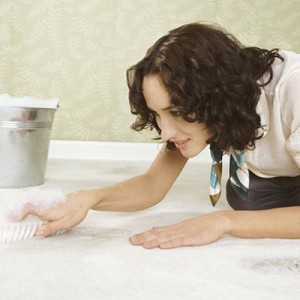
Next, spray a little of the mixture on the carpet in small areas, or soak the sponge in it, and wring carefully so that the sponge is not overwetting the carpet.
Use a medium-bristle brush in order to scrub the liquid mixture deeper into the carpet fibers.

After that, soak a clean sponge into clean water, wring carefully and repeat on the same spot on the surface in order to remove remained solution.
Repeat this step till there are no soapy bubbles coming off onto sponge.
Do the exact same steps onto the next spot until you have gone through the entire carpet surface.
Blot the carpet dry with a clean towel.
For stains that won’t remove from the first time, use a toothbrush for scrubbing.
And at the end when the carpet is no longer wet, get a stiff bristled brush to fluff the carpet.

With this list of ten useful, effective and easy steps you can take care of almost all types of carpets in your home with a cheap home-made solution.
Good luck.

Things You Should Consider About Air Dust Cleaning

There are various factors which should make you consider having the air ducts at home cleaned.
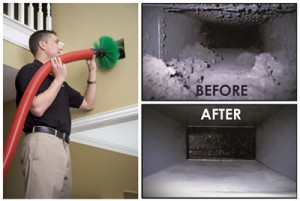
1. If there is visible mould on the inside walls of the ducts or other components of the system, then you should seek professional help. When it comes to mould, there are a few tips to recognition:

  • you can’t of course, check all the areas of the air ducts for mould, so if the cleaning company say that there is mould, ask them to show you.
  • there are many things that could resemble mould; as only an expert can determine what the dark spot you see is, it’s recommended that you bring a sample on a clear strip or sticky tape to a laboratory (it’s not that expensive).
  • If you have insulation on your air ducts and it gets dirty, it cannot be cleaned – it has to be replaced.
  • even when you remove the mould, if the environment that caused its appearance in the first place is not changed, it will continue to grow.

You must also clean your air ducts if they are infested with rodents or insects, or are clogged from too much dirt that is released into the home.

There are also some other considerations at hand. You should know that this procedure – air duct cleaning – does not prevent health problems. It has not yet been determined if air pollution is caused by dirty air ducts, and if the pollution level goes down after the cleaning. There may be dirt in the ducts, but that does not necessarily mean that it enters the living area. It’s just one of the many possible causes. Most of our everyday activities – cooking, cleaning, smoking, or even moving can make you come in contact with contaminants – and the risk is even greater than with dirty air ducts. It hasn’t also been proven yet that the household dust in the cooling or heating system can pose a threat to health.

It’s not recommended that you clean your air ducts except in emergency, at least that’s EPA’s opinion. They say that it is still uncertain what the benefits of the procedure are. They, however, advice you to inspect your fuel burning systems, if you have any. Make sure that they function properly before the heating season, or you may become the victim of a carbon monoxide poisoning. There’s no proof that cleaning the air ducts will improve the system’s performance, but cleaning the fans and heat exchangers should help.

If you feel that you should, after all, have the air ducts cleaned, seek a professional’s guidance. The system’s service company will do. Also, inform yourself about the services that different air-duct cleaning companies offer.

Cleaning Your Pets’ Mess

Many households posses one or two pets and their landlords know very well how irritating the cleaning of a mess can be after these, otherwise, sympathetic rogues. Their faeces are a reaction of uric acid, hormones, bacteria, nitrogen and ammonia. They are quite resilient and the humidity in the air helps their intensity.

The reception of scents in dogs is multiple times stronger than the same in the humans. That is why it is crucial that we eradicate all clues of the canine urine. If we let it the way it is, the pet might come back to the same spot, again and again, doing its work trouble-free. This happens when it is not completely used to the house or there is a huge gap of time between outdoor walks.

Here is some useful advice for total cleaning of canine stains from the flooring:

Find and utilise a cleaner with an absorbent material. Those can be paper towels, a rag or a cloth. Soak up the most of the stain to the allowable extent.

Spread cold plain water over the place and blot up the wetness with clean second paper towel – keep doing so till there is no more yellow on the towels. If necessary, repeat several times; each time with clean paper towel, or cloth.

Irrigate the stain with a natural deep cleaner by following the directions on the back of the bottle you bought for the purpose. Leave the place rest for the prescribed period of time.

Soak up the detergent with more towels, as much as possible, and leave to air dry. Do not walk over the area while wet.

If the stain was there for a long time, it is possible that you have to replicate the process with the deep cleaner again to get rid of the slightest clues of bad stink and yellow spots entirely.

Here are examples of non-toxic detergents and ingredients for cleaning of urine:

1. Put together a part of hydrogen peroxide and two thirds of water. Moisture the spot by going out of its visible borders with your thumb. Leave the compound rest on the stain for 5-10 minutes. Soak up the damp. Pour some water on it and use new towels to blot it up.

2. Find concentrated white vinegar. Do not use water to mix and apply the substance to the spot completely until wet. Leave it for several minutes. The scent of the vinegar will be strong, so you can open a window, if it is too hard to bear. Blot dry with paper towels, a rag or a cloth.

3. Use baking soda. It burns slowly any dirt and is efficient for numerous other occasions at home, when cleaning is needed. Cover the stain, leaving the width of a thumb outside its area and leave it for a couple of hours. Do not walk over the area. Vacuum clean.

Cleaning Pet Hair

Pets may be cute and lovable – the perfect companions – but they seem to leave a part of themselves everywhere around the house. Yes, that’s the notorious pet hair. It sticks to everything – carpets, furniture, and all other fabric one can find in a home, your clothes included. That makes pet hair very, very annoying. So, if you want to get rid of it, follow these steps below.

You will need some water, a sponge, a pair of latex gloves, a vacuum cleaner with the upholstery attachment, some wide tape, a lint roller, Velcro, some dryer sheets and some liquid fabric softener.

There are different methods with cleaning the annoying pet hair up:

You can dampen your hand with clean water and rub it on the hairy area. The hairs will clump together because of the moisture and will be much easier to remove. For the best result, start brushing from the top to the bottom.

If you can find a pair of latex gloves with textured palms, use them. They are perfect for removing pet hair. If you moisten them with a bit of water, it will add to the hair-removing power.

Moisten a sponge slightly and rub the area with it. Make sure that no water drips from it.

When you use a vacuum cleaner, you will be able to remove pet hairs very easily. Use the upholstery attachment and the hair will be suctioned. It will also remove the pet dander. If anyone in the house has allergies, use a vacuum cleaner with a good filter.

If you don’t have a lot of time, or when you want to clean your clothes, use a lint roller or some wide tape. Wrap the tape around a hand with the sticky side out and roll it across the fabric. It will pick up all hairs. It’s much easier if you use a lint roller, though, so make sure to always have one at hand.

Dryer sheets can be useful in this case. Take a fabric softener sheet and rub the surface with it. The hairs will just loosen themselves from the fabric.

If the carpet has a lot of stuck-on hair, make a mix of some fabric softener and water and pour it in a spray bottle. Spray some on the carpet and let it dry. After that, vacuum the carpet as you normally would. The fabric softener will loosen the hairs and you will be able to remove them easily with the vacuum cleaner.